I’ve always considered bike racks for surfboards surplus to requirements. I learned to cycle one handed around age 6, and have been pretty accomplished at it ever since. Thus my board rack has been one of my arms, usually the right. Even when surfing the heavy log, I’ll just jam it in above my hip bone, flat. Alternatively, for off road use or for longer journeys, I’ll generally use a board bag, hooking the carry handle over the handlebar.
Simples.
In fact, the use of bike surf racks might be yet another way I’ve tended to use to judge people, reinforcing my own deeply entrenched worldview of general superiority in terms of both ideology, and operating skills.
Like, say, running with trainers (instead of vastly superior, injury preventing, natural barefoot). Or having a 3 grand e-bike. Or, having a 3 grand e-bike with a board rack and running with trainers, people for whom I reserve a term perhaps bit strong for WL, the insult Sully returns in the vengeful prison face burning scene in Top Boy,
“Who’s the f-ken ______ now?”
However, not everybody feels the same. My wife, for example, is less confident with one arm cycling. Sure, I could have just bought her one, but I fancied a little DIY project, Korduroy TV vibes circa 2009.
Also, in terms of pressies, she appreciates the time and care taken, rather than just another gormless ‘add to basket’ click.
I made her a garden chair from deck wood (anniversary, B-day and Xmas pressies combined), a truly great chair. I made a bird box that a pair of great tits (Parus major) are nesting in right this very now. The best part is I get to lord it over her each and every time she sits in the chair or looks at the nest box. As she tries to drink a cool beer on a hot evening under the shade of the cherry tree, I’ll inevitably pipe up with, “With my own bare hands…” reminding her just how very lucky she is to have found me.
To build her bike rack, I bought all the stuff from my local DIY shop Briconauts, which is a small, relatively pricey shop that closes for lunch. I could’ve got it cheaper in a much bigger one, but would’ve needed to drive there on the motorway for 15mins, sorta defeating my whole purpose.
Cost: 24 euros on pipes, fixtures, glue & bungees.
Time: About 2 hours (not including a return to the shop to change wrong bits, obvs.)
Tools: An old hack saw with a blunt, rusty blade just about did the job, plus a drill and a bit of old sandpaper
Difficulty level: 2 (1 = peasy; 5 = nails)
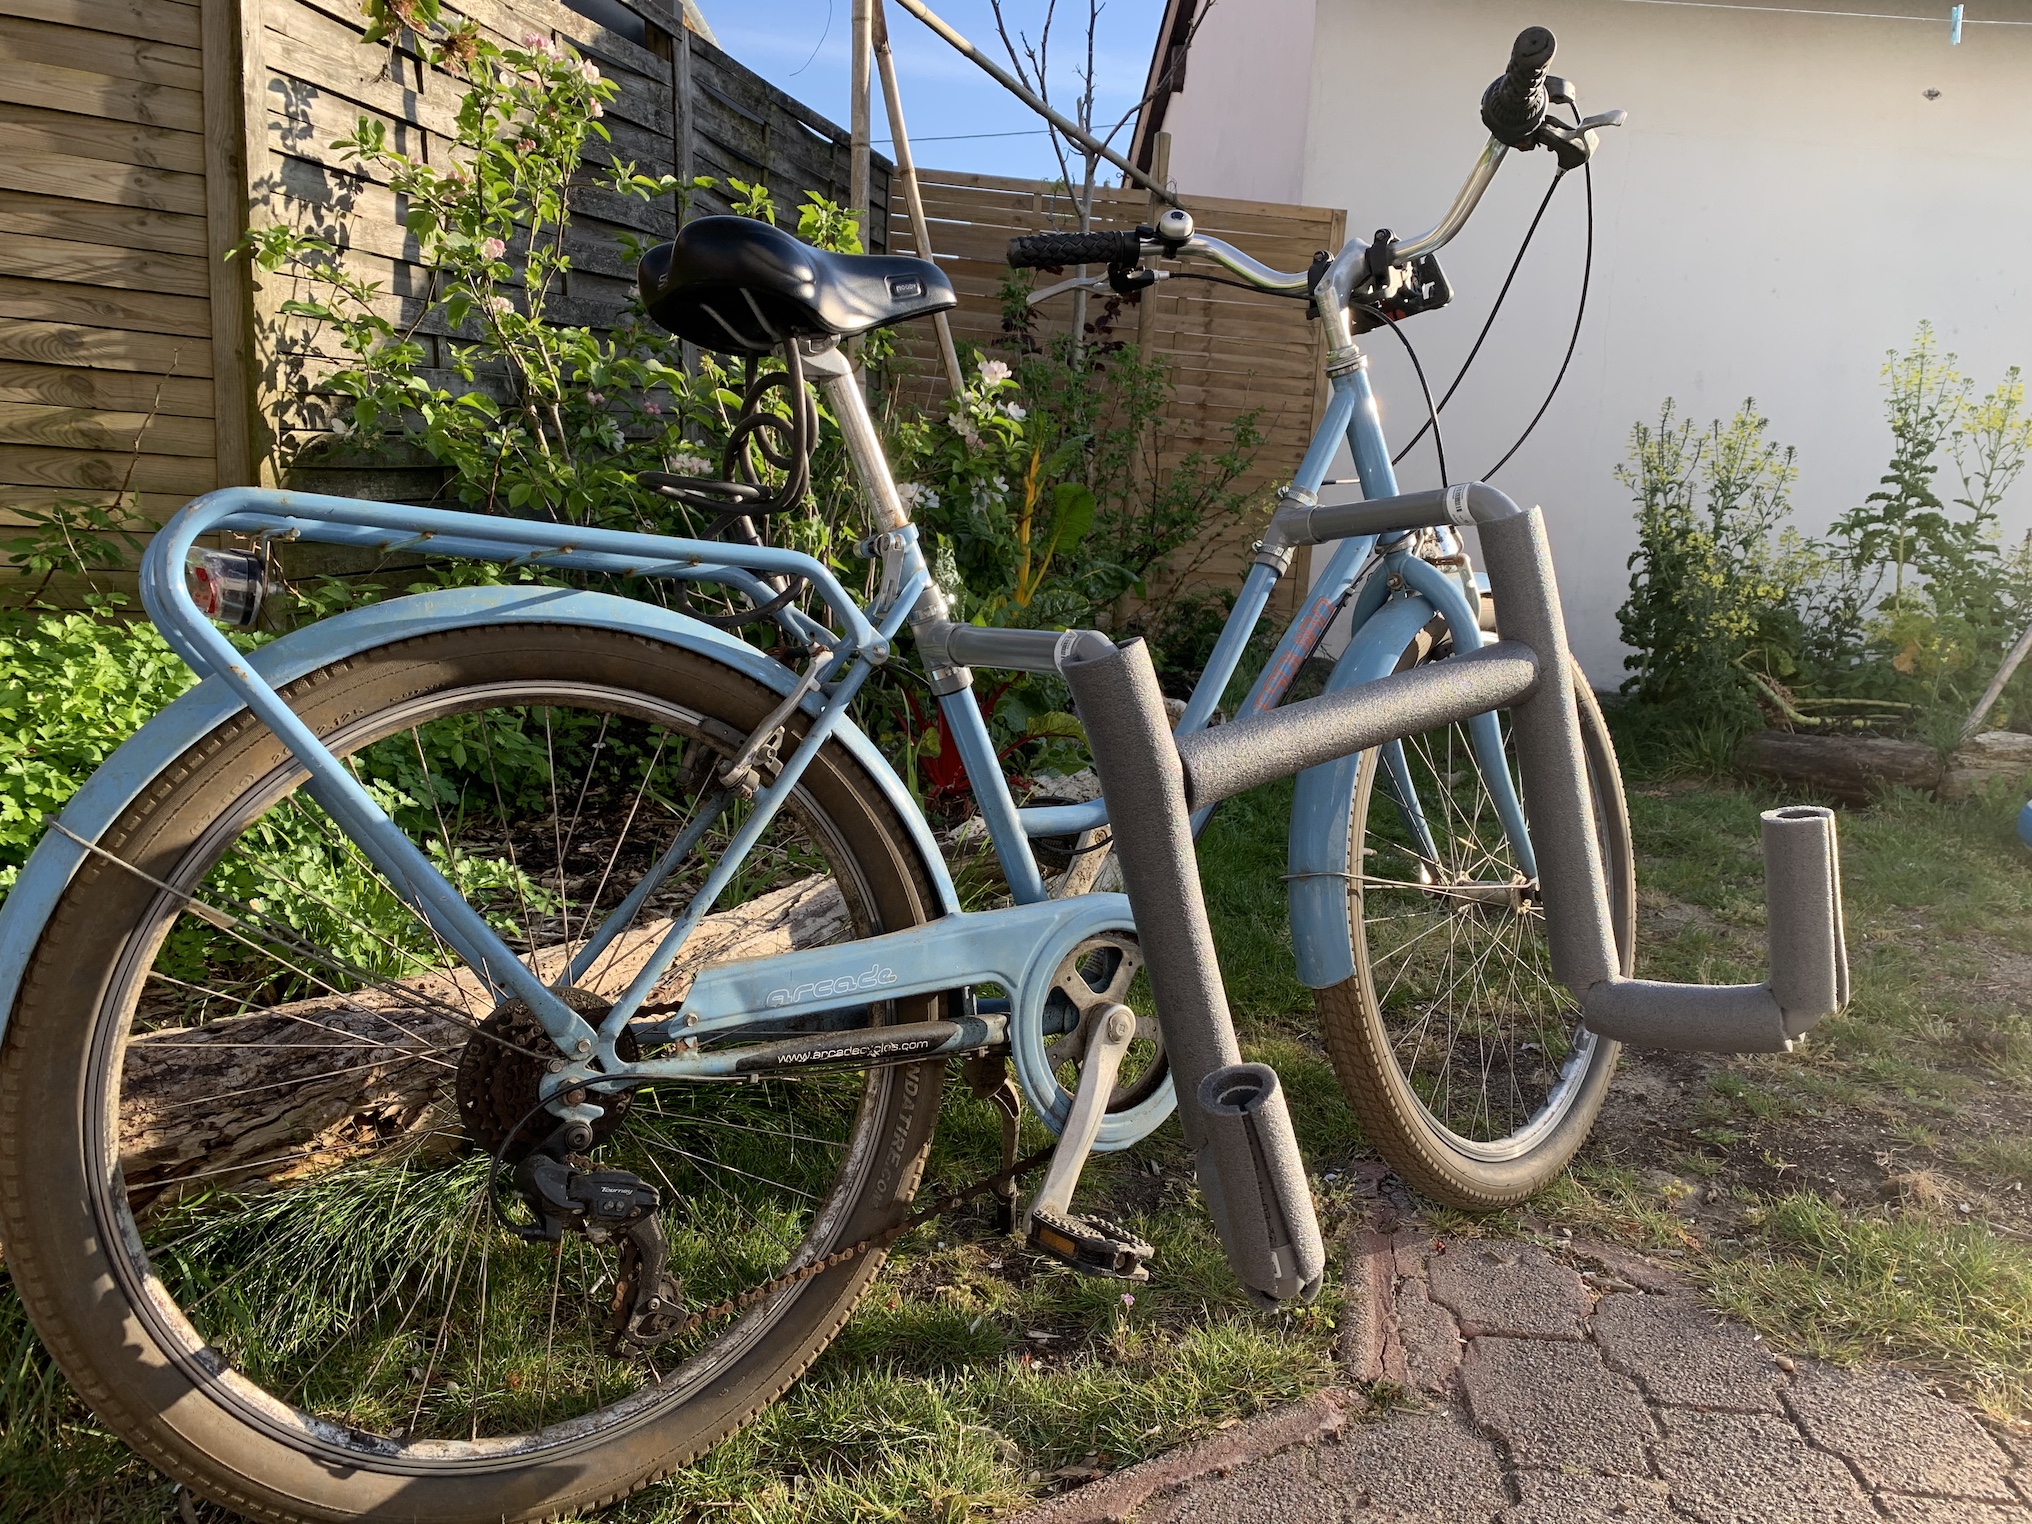
Bike: The bike actually belongs to Billy Wilson, formerly of this parish. He bought it on a surf trip last year rather than rent one for a month, at my recommendation. Imagine my surprise when he couldn’t take it back on Easyjet, and so left it at mine. But any bike will do, even one you actually own.
You’ll need: 2m 32 mm diameter PVC pipe, 6 x L joints (female/female)
4 x T joints (female/female), 2 x 1m pipe cladding, 4 x hoseclips
PVC glue (small 50ml tube way more than enough)
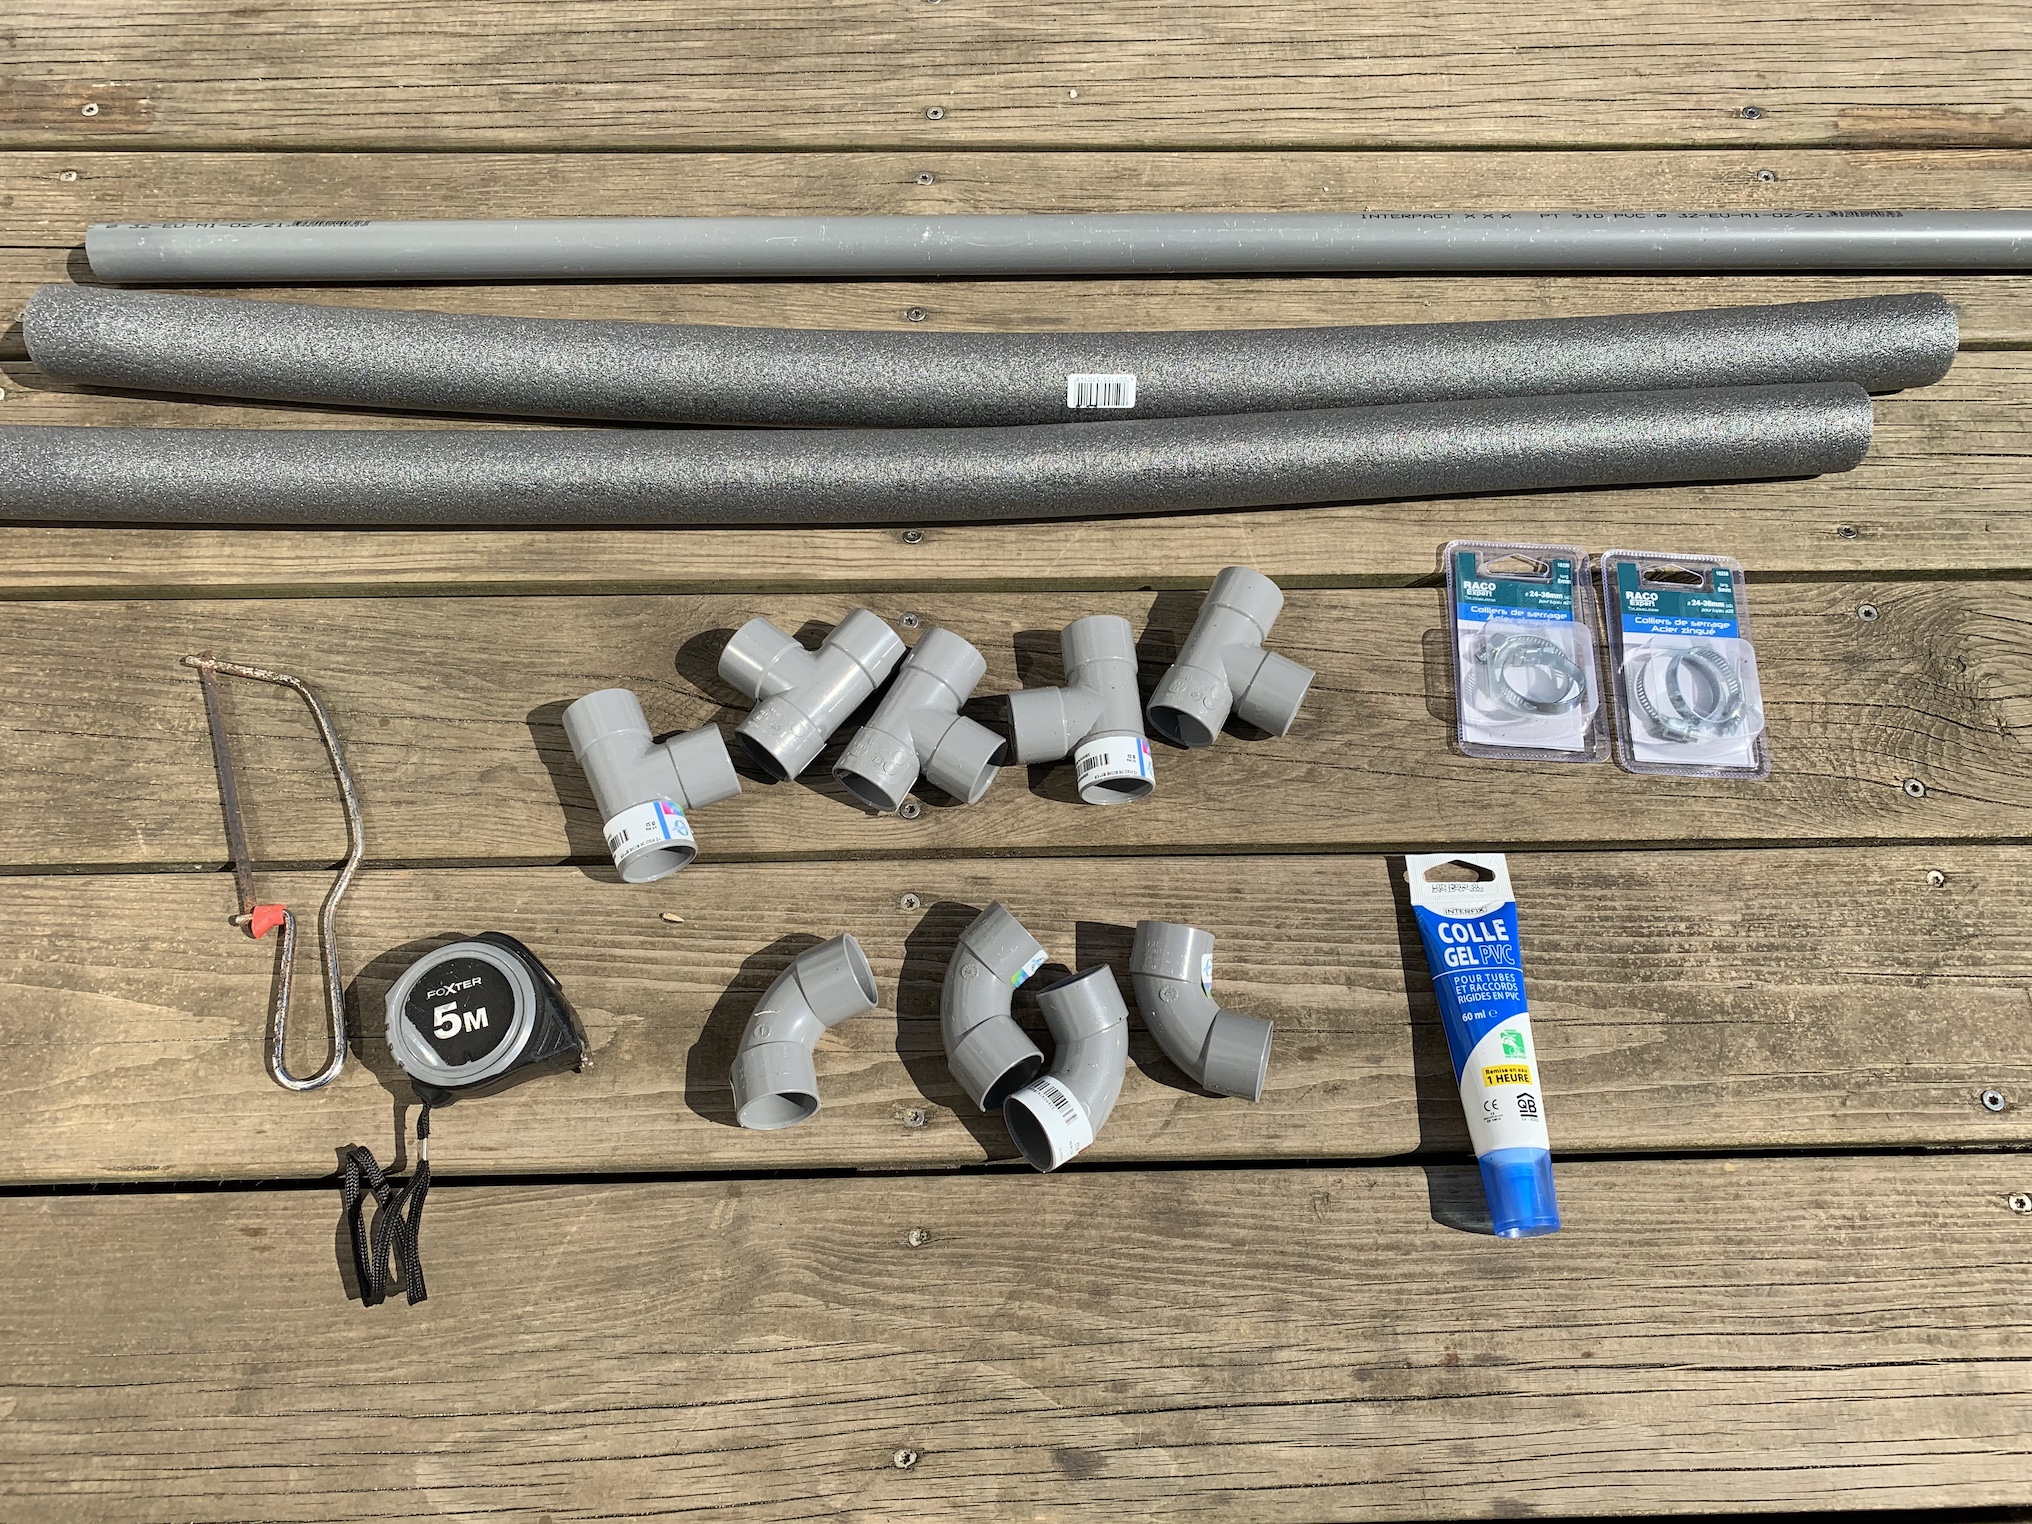
The raw materials.
1. Measure your bike frame to get the right diameter for the T joints to be cut and attached. Mine were only the right size in centre (having wider female attachments) so I cut a bit of old inner tube and wrapped around the frame that to make up the space at the ends.
2. Saw two T joints vertically with a hack saw, to attach your bike’s frame. I only had a crap hack saw, old and blunt and I have no vice to hold it whilst sawing, so my cuts weren’t the straightest. I actually got my 6-year-old Joey to hold it, so that it was his fingers on the line rather than mine; I need mine to type to keep creating art, keep wolf from the door, etc.
3. Attach the sawn T’s to bike with the hose clips, fully tightening later when everything’s cut, just before you glue.
4. Give yourself a good inch or so clearance from pedal out from your T on the frame with a horizontal pipe. Saw these. Add an L turn down, then add the T’s on each down for a cross bar between the two racks, for stability.
5. If your frame attachment T’s aren’t exactly level (mine aren’t), you can remedy that with different lengths of downpipe to get the two racks close to the same height.
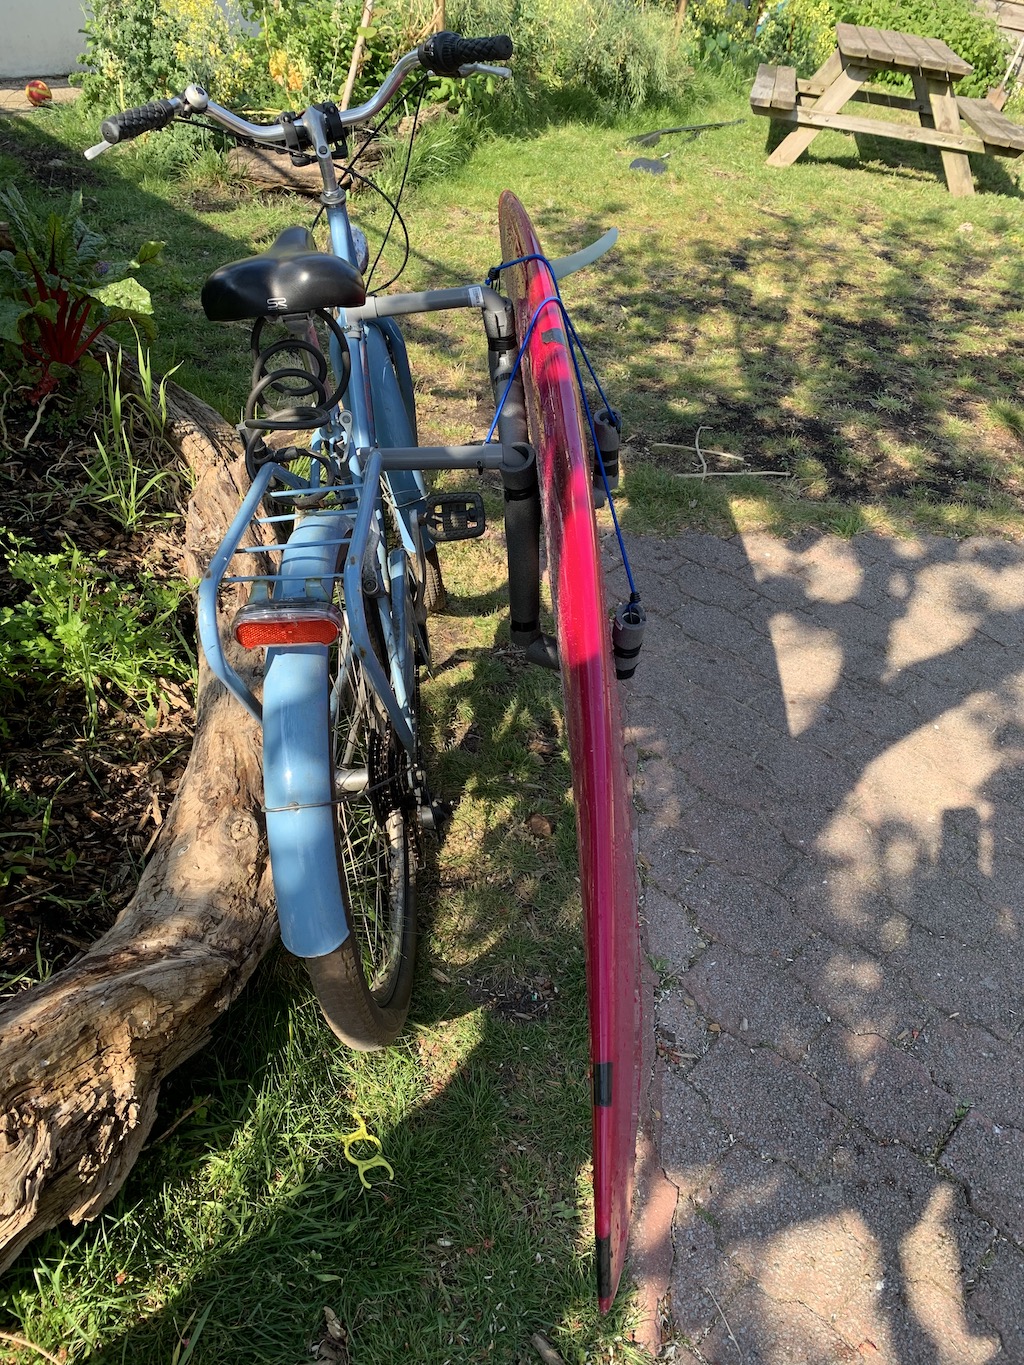
6. Add 2 L’s at the bottom of each downpipe to make a U for your board. I put gap of about 10cm width, in case I wanted to use it for my log. I probably didn’t need to, as this design definitely favours lighter boards; I’m not sure I’m trusting enough in my own DIY skills / the PVC glue to bung the priceless Phil Grace redwood stringer 9’6” beauty in the rack, just in case.
7. You don’t need much height for the outer part of your U; I came up 15cm or so.
8. When it’s all put together, check you can pedal/ride the bike. Then, when you’re happy, mark all joints with a marker to help realign it correctly, take it apart and glue everything using the PVC glue. It fixes fast, so don’t dilly dally.
9. Cut your cladding and pop it on. I used a bits of duct tape to keep the cladding in place, and it’s pretty satisfying squeezing it in with a nice tight wrap of tape.
10. Lastly, I drilled little holes for bungees. The DIY only had heavy duty bungees, so I bought some lighter elastic cord and the small bungee hooks (pack of 4) and made my own custom bungees.
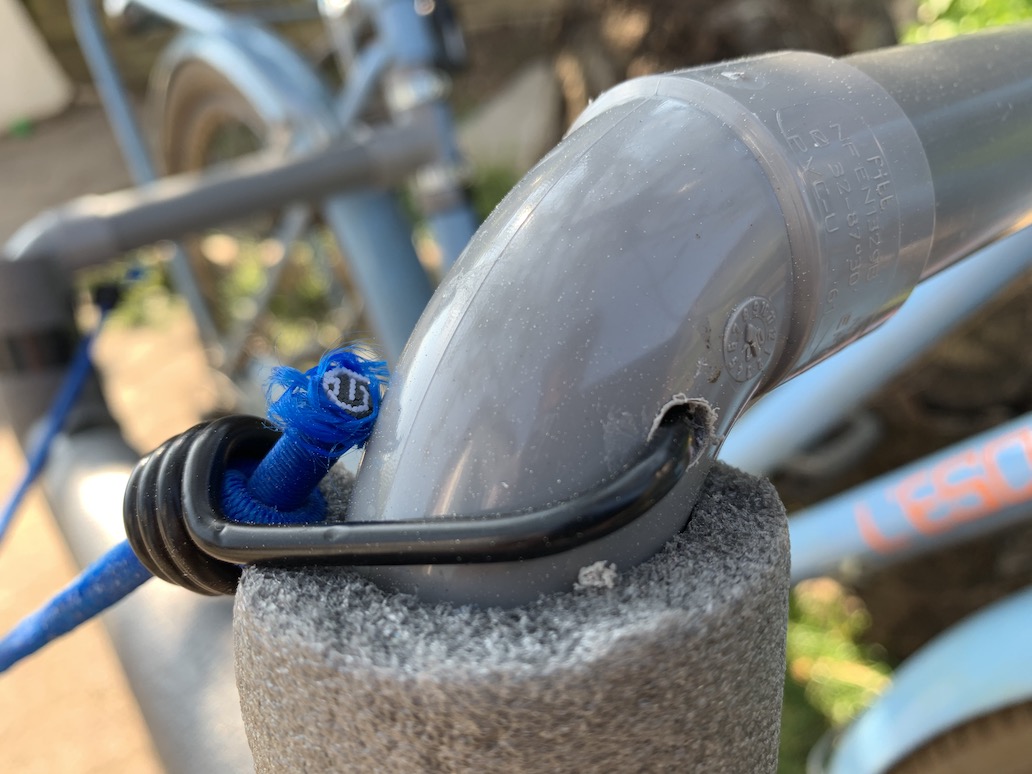
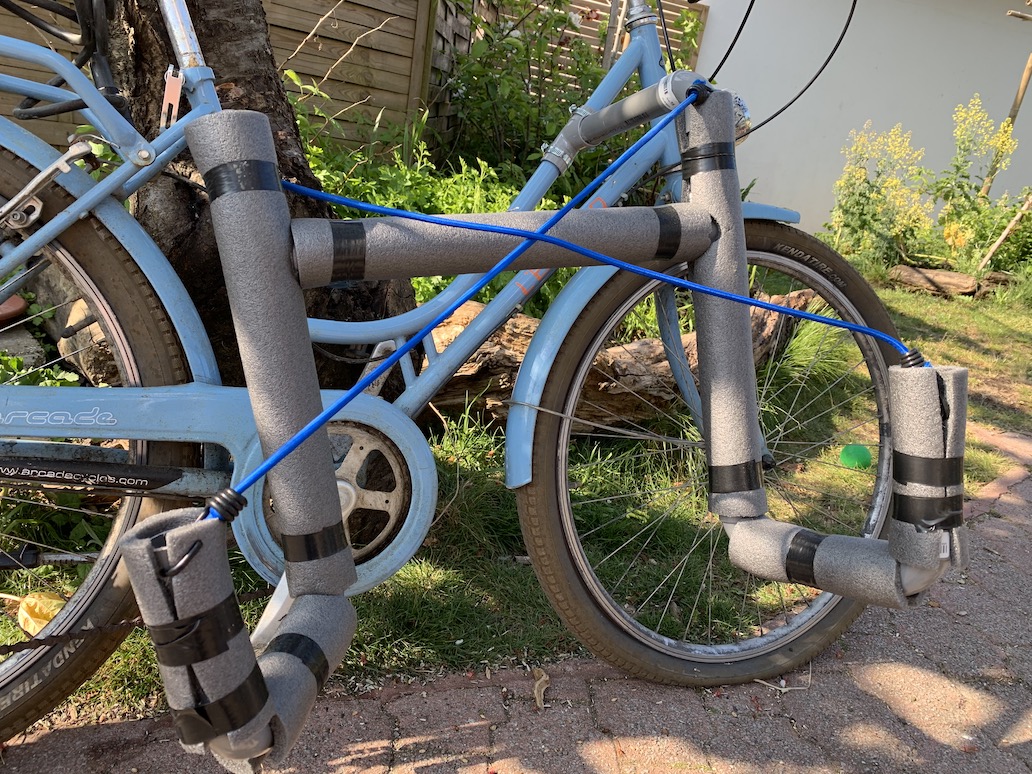
The foam cladding slides nicely into place, but I added a wee bit of duct tape, coz surf; Drill little holes for your bungees; With cladding taped and bungees attached.
After a few test surfs, I concluded it’s a bit of pain in the arse to have on the bike the whole time. So I’d advise to make it quick release, by either by not gluing the first joint or horizontal pipe that goes into the cut frame T, or, as I did, retrofit: Sawed the horizontals, glued a sleeve to the rack side, drilled thru and put a split pin/wingnut on the frame side. It’s really light and easy to hang up out of the way, then simply clip it on come shred o’clock.
Aside from the personal satisfaction from making your own rack, it also frees up cash to spend on in water surf accessories, making a direct improvement to your surfing life.
You could invest your saving elsewhere. If you save say £50, you could buy half a tincture bottle of magic mushrooms extract, or 1 and half kilo of organic cashews.
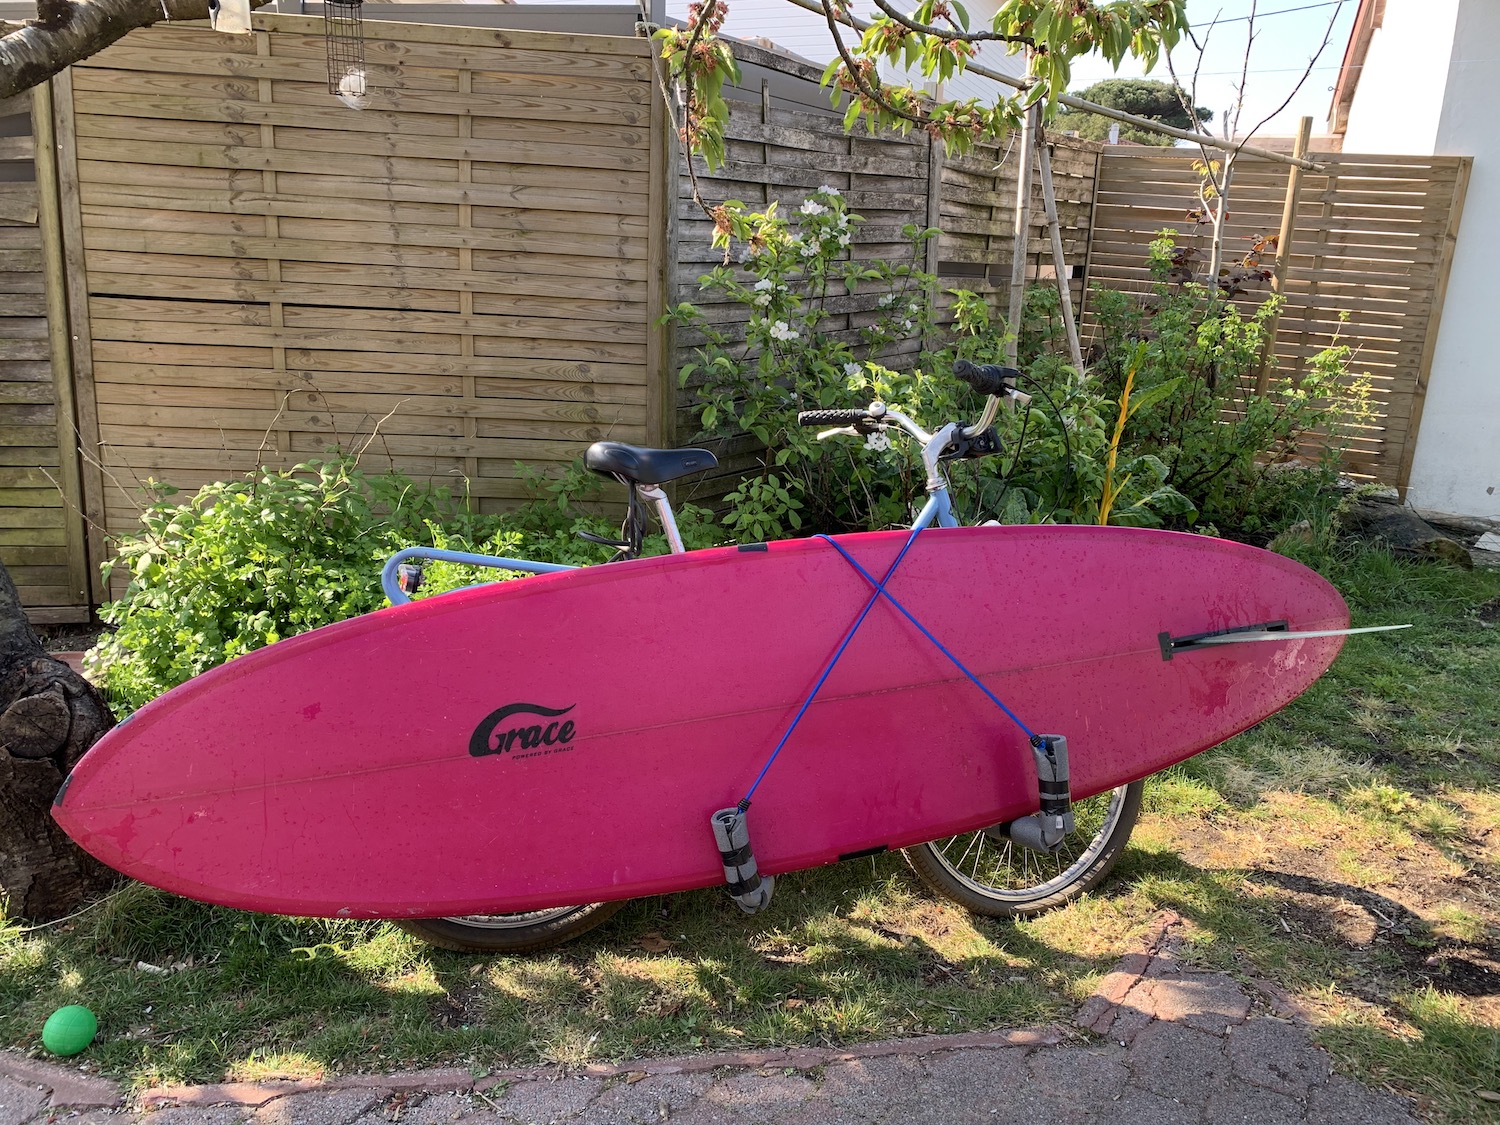
Wilson’s ex-rental powder blue ladies’ bicycle with custom PVC surf rack cradling the 7’5″ Gracey egg.
N.B. I sent Bill the above pic of his bike with rack to which he, being very well versed in my prior views on the topic, simply replied:
“Pussyole”
