As Summer finally looms and it’s clean swells begin to adorn our local coastline, it’s time to dust off your funnest sled and get amongst it.
Whilst twinnies and fishes are ideal for those mellow cruiser sessions, they also offer slightly different avenues of progression than you get on your shortboard, giving you the chance to add some more classic manoeuvres in to your repertoire. Accordingly we asked twin-fin enthusiast Alan Stokes to walk you through how to start laying down a 70s inspired layback carve:
Step one – Work on your core strength. This entire turn relies on having a really strong core, as you throw your centre of gravity off and lean back into the wave. It is your core strength that will allow you to stabilise the board and give you the ability to lift yourself back onto it again.
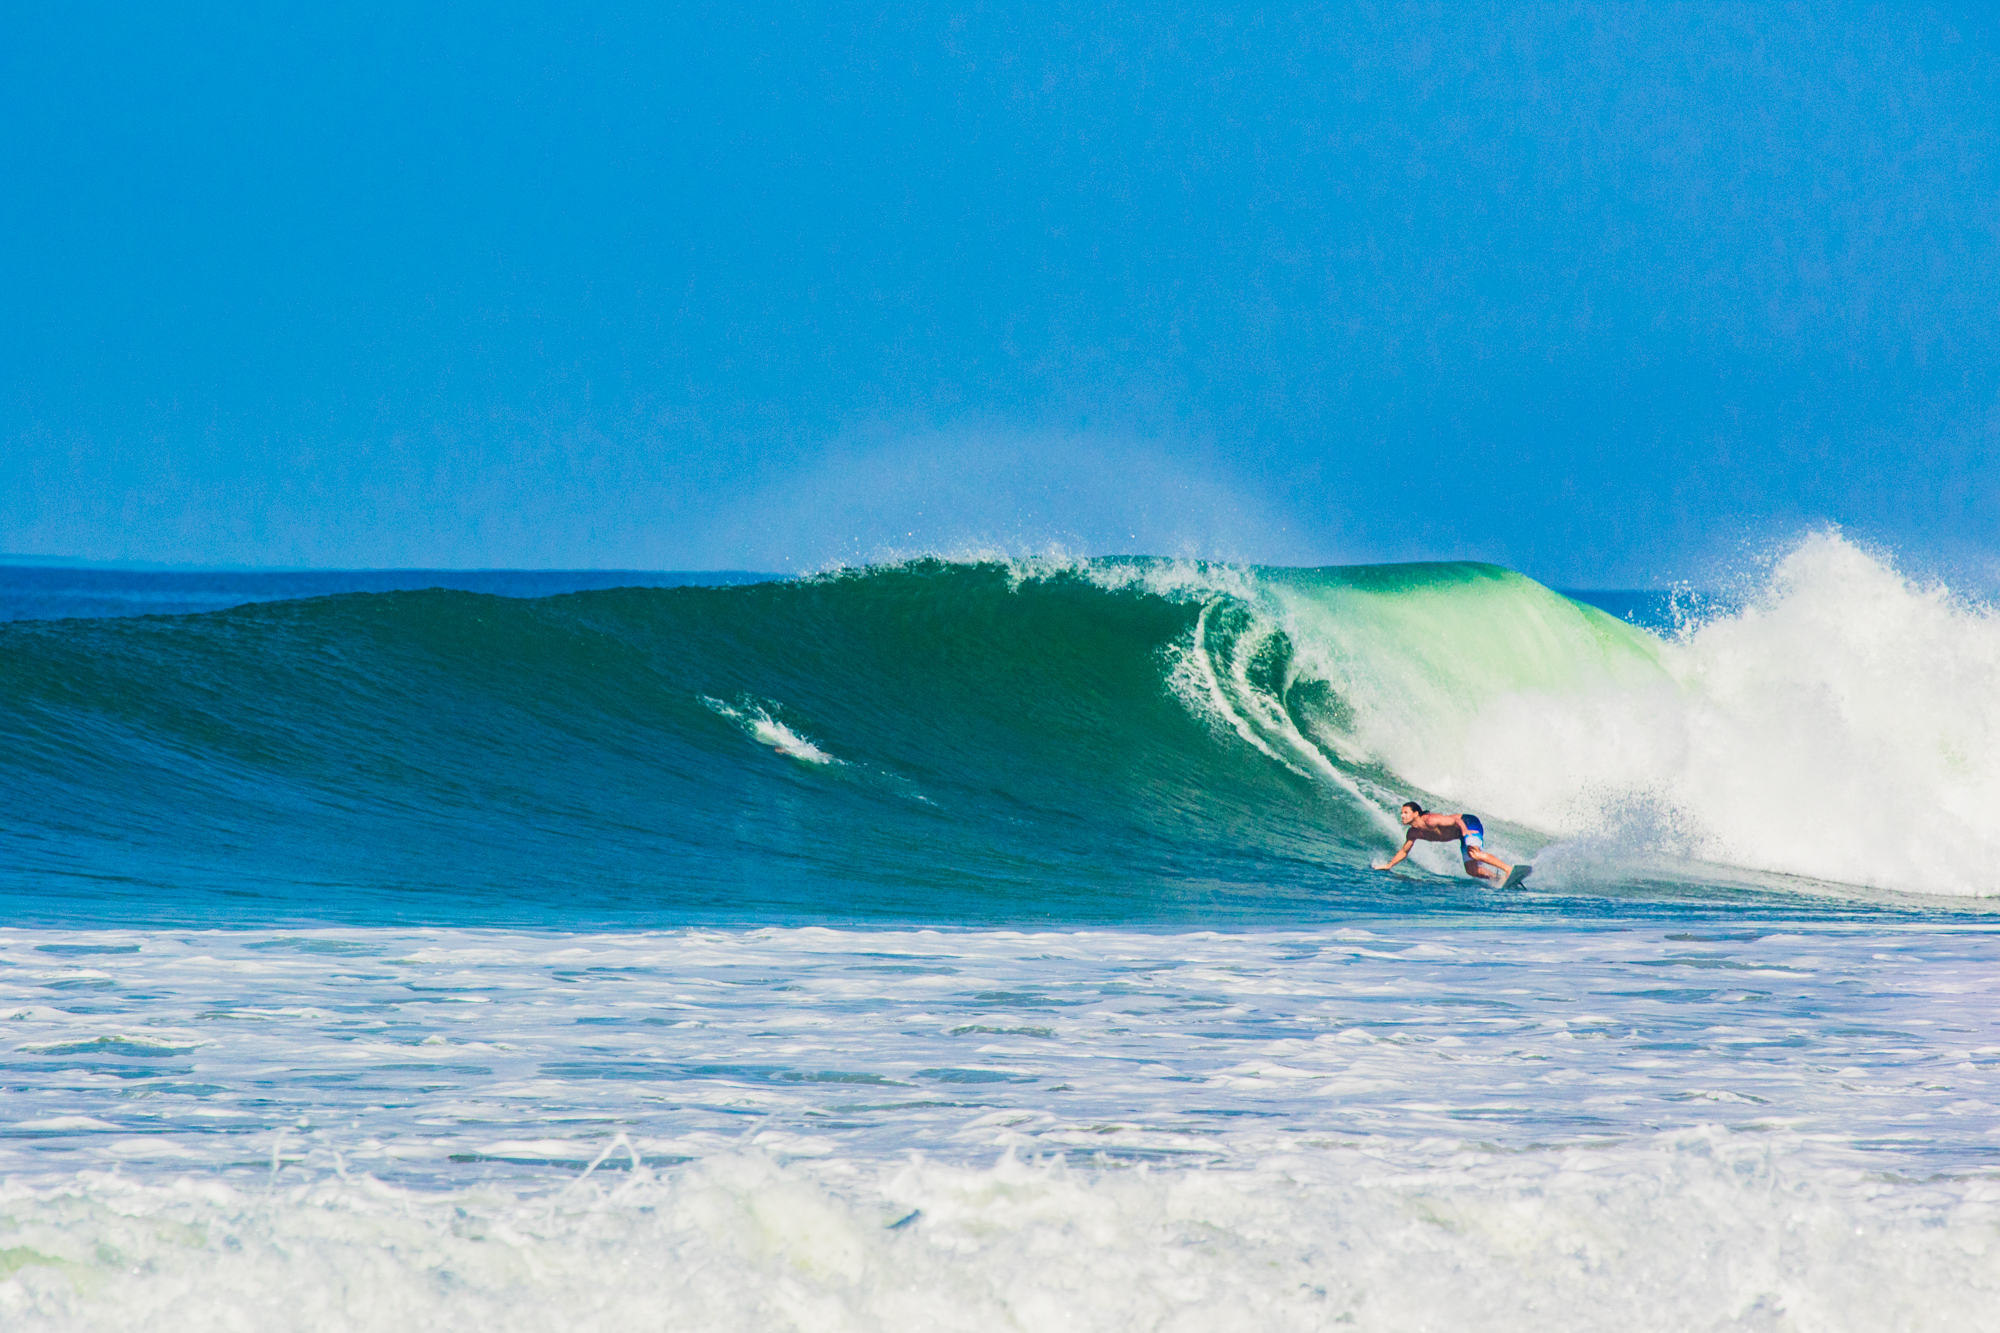
Next, you have to tailor your bottom turn to meet the section you want to carve into with loads of speed. To do this you need to eye up your section down the line and start to set your bottom turn so that it will project you at the right angle. Timing is everything here and for added style try to delay your bottom turn for as long as possible, maybe with a casual straight legged freefall from the take off out into the flats.
Step two – The trick to these turns is speed and rail commitment. You really need to be going mack ten to do a good lay back carve, so try these when the waves are clean and overhead is best. The reason you need all of this speed is so that once you begin your carve and the outside rail is starting to bite, you can shift your weight over your heels, putting your trailing arm in the wave face behind you. This is the most committed part of the turn. Not enough rail engaged or speed and its very easy to slide out or get bogged down and lose all your momentum, as your body starts to drag on the wave face.
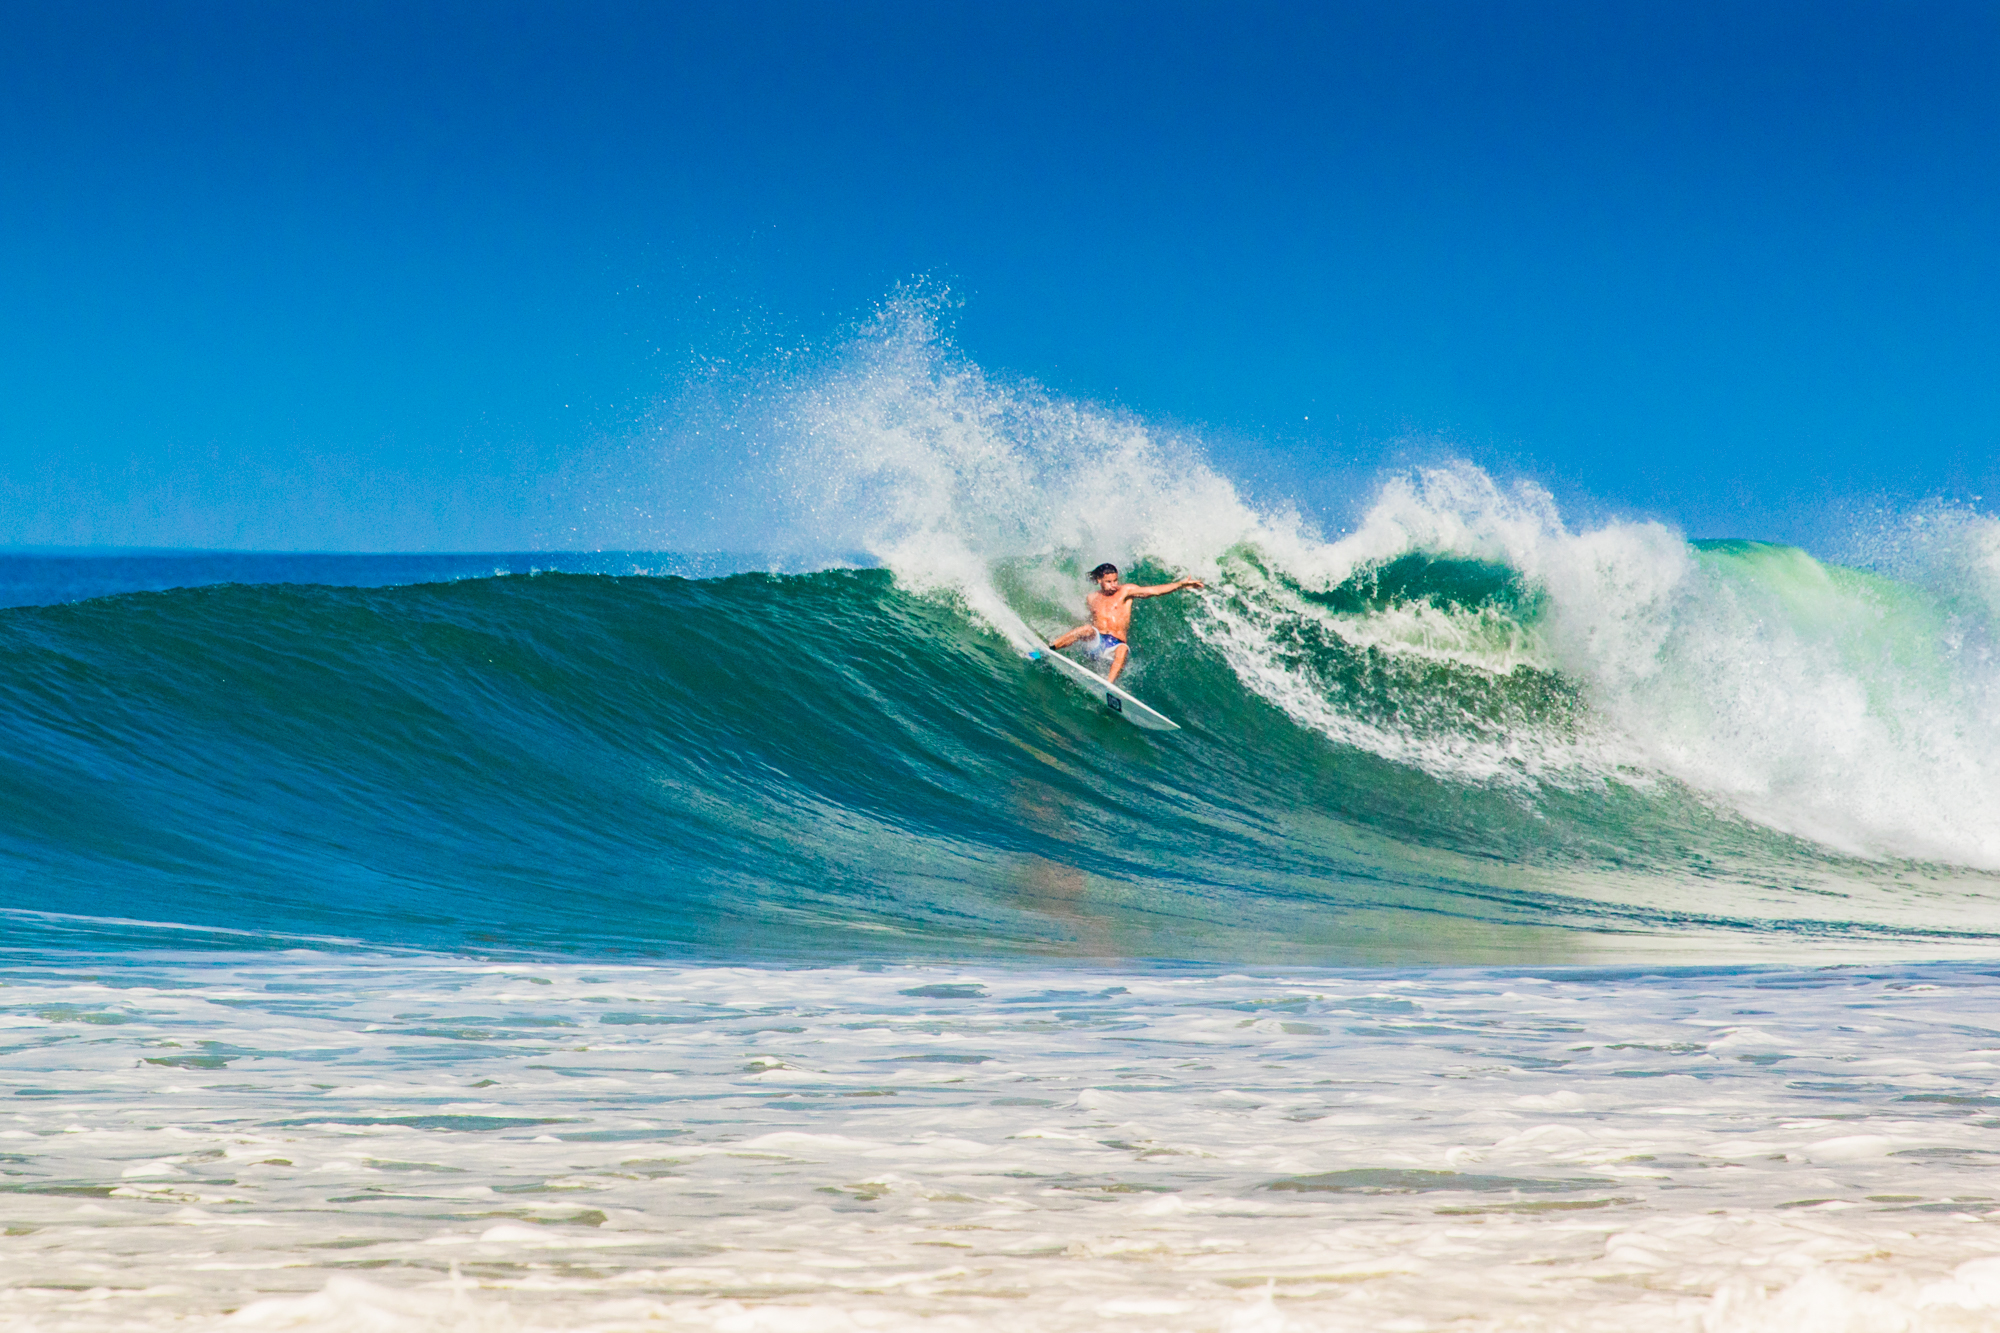
Step three – Now that your body position is correct and your rail is slicing through the wave face, it’s time to rotate through the turn and power out of it. This is where leg and core strength come into play. Having good knowledge and knowing how your boards rail outline is going to draw a line through the face, as you arc through the turn is key here.
Keep weight over your heels as you rotate your arms and upper body through the turn, allowing your legs to follow the same line.
As you wrap back into the pocket there will be a point where your rail will want to break the wave face, knowing when this is going to happen and where that breaking point is on your surfboard, will allow you to be ready for when it happens. Practice is the only thing that will teach you this Yoda like perception.
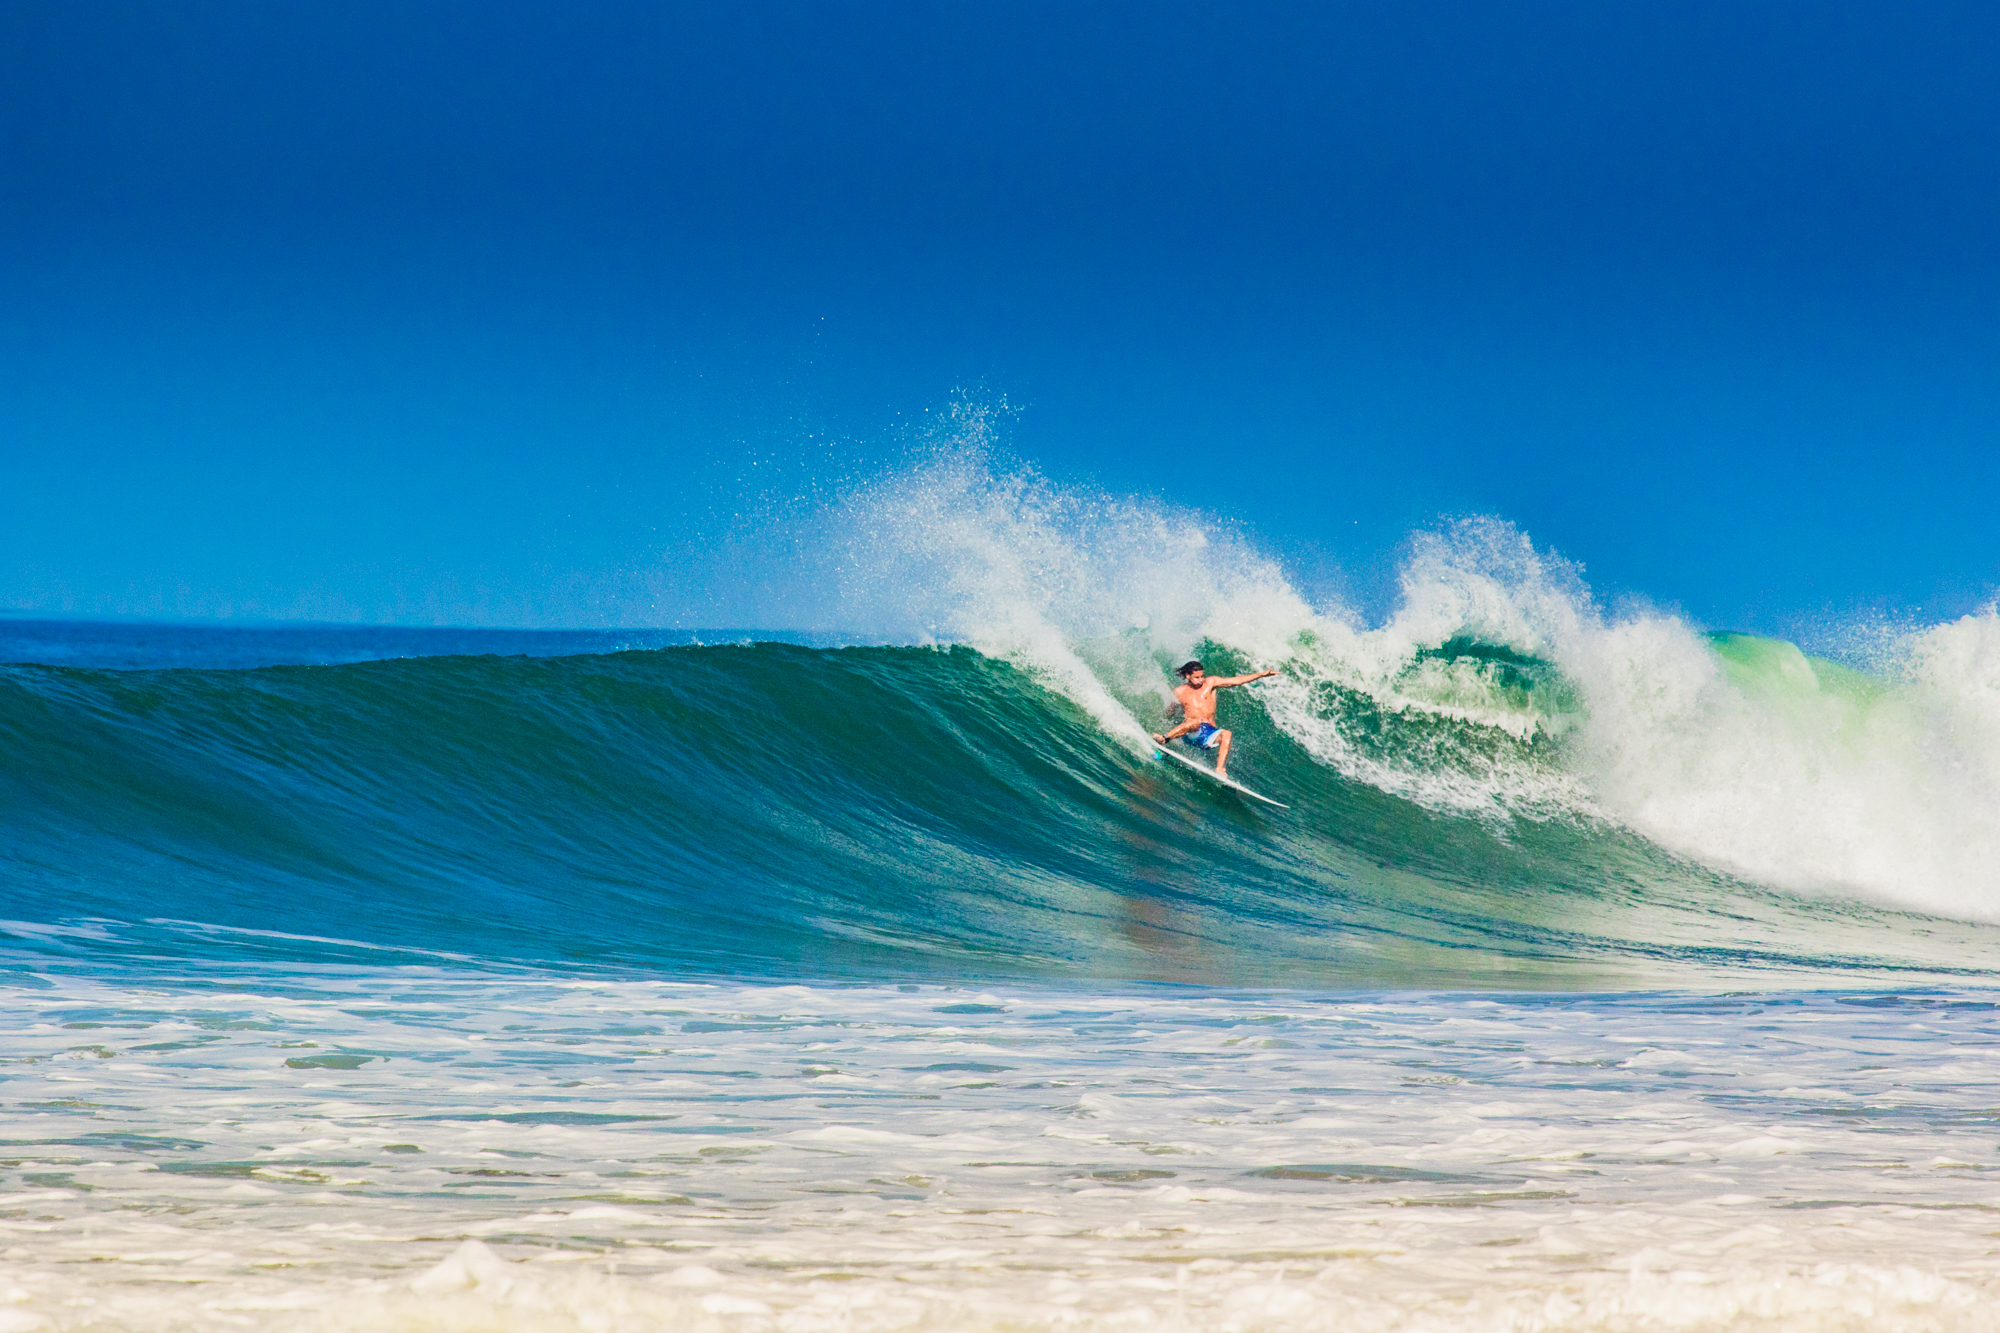
This is the hardest part of the turn to conquer and usually where everything goes a bit pear shaped. Let the rail break the wave face and as your board begins to slide be ready to get back over it. You’re going to speed up really fast if you’re on a decent sized wave like this one, so it’s really important to get your weight back over your board and then start to re-engage the fins to drive out of the turn and into the next bottom turn.
The best way to really nail these turns and add some flare – Just when you feel your board getting twitchy under your feet and starting to slip, turn on the power and really load up all of your weight into the back end of the rail. Rotate and bring your shoulders down to get the fins back into the water. This will give you control and will enable you to lift your body back over your board quickly.
To speed up your learning curve, I would say visualisation works beautifully well. Watch some footage of someone doing one, watch it ten time or more. Then close your eyes and visualise your self doing the same turn. Try to feel it in your muscles. Repeat and then hit the surf and give it a go.
Fancy joining Alan Stokes in Costa Rica, with Ticket To Ride and Wild & Free Retreats, for a bespoke 10 day surf and yoga experience? Find out more here.
Photos @pindygram